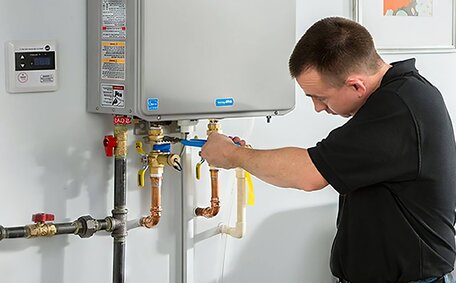
Signs Your Hot Water System Is Failing
Common signs your hot water system is failing include strange noises, rust, leaks, inconsistent temperature and pressure. Call our licensed plumbers if you notice these issues for repairs.
Read MoreGas water heaters use natural gas or LPG to heat your water, relying on a pilot light to ignite the main burner. If this pilot light extinguishes, you’ll need to relight it to get your hot water running again.
This guide offers a straightforward, step-by-step process to safely relight your gas water heater’s pilot light. With these instructions, you’ll have hot water flowing again swiftly.
You’ll learn to access and prepare the pilot light assembly, ensure correct gas flow, ignite the pilot with a manual or electronic method, and test its functioning. Plus, you’ll find troubleshooting tips for common ignition problems.
Our aim is to empower you to relight your gas water heater’s pilot with ease, ensuring the quick return of your essential hot water supply.
Safety is crucial when relighting your gas water heater’s pilot light. Taking simple precautions can prevent mishaps and guarantee a seamless process.
Before getting started, do a thorough check of the area around your water heater:
To prevent unignited gas accumulation, it’s advised to turn off the gas supply at the mains or cylinder before relighting; then allow 5-10 minutes for any residual gas to dissipate.
Adhering to these safety measures is in line with best practices for handling gas appliances and helps ensure a successful relighting of your water heater’s pilot light.
After checking for gas leaks and clearing the area around the water heater, the next step is to turn off the gas supply.
Locate the gas control valve for your hot water system. This is usually found near the bottom of the tank or on the gas line leading into the unit. The valve will look like a spigot or knob.
Carefully turn the gas control valve a quarter turn in either direction. This shifts the valve into the ‘off’ position, stopping gas flowing to the water heater.
Wait 2-3 minutes once you’ve turned off the gas. This allows any residual gas in the pipes to dissipate instead of building up.
With the gas supply now safely switched off, you can move on to the next stage - accessing the pilot light assembly.
After shutting off the gas supply, it’s crucial to wait 5-10 minutes before attempting to relight the pilot. This allows time for any unburnt gas lingering in the pipes or around the water heater to fully dissipate.
Gas that has not ignited can concentrate in an area over time when the pilot light is out. If you immediately attempt to relight while this gas is still present, it heightens the risk of ignition and explosion.
Allowing a waiting period of at least 5 minutes gives the gas time to completely clear. This safety step safeguards you against potential gas-related hazards when relighting the pilot.
Don’t rush the process. Always let the water heater sit for the recommended wait time so any unburnt gas can dissipate. This simple pause will reduce risks considerably, making relighting the pilot a safe procedure.
To access the pilot light, you’ll need to locate the access panel on your hot water system. Refer to your owner’s manual to identify where this is situated, as locations can vary between models.
On most gas water heaters, the access panel is near the base of the tank. It may be held closed by screws or clips. Carefully open the panel using your hand or a screwdriver.
If you cannot locate the access panel, check for a small viewing window instead. Some models allow the pilot light to be accessed through this window without needing to open the appliance.
Illuminate the pilot light assembly with a flashlight, usually identifiable as a small tube connected to the gas supply line.
Take care not to touch or damage any parts inside as you’re locating the pilot. Most pilots have printed lighting instructions visibly nearby to follow once access is gained.
The next step in relighting the pilot is to set the gas control valve to the ‘Pilot’ position. This setting allows gas to flow only to the pilot light tube, without opening the main burner supply.
On a basic gas control, this involves turning a knob or sliding a switch on the gas valve to the Pilot marking. Other more advanced electronic controls feature an igniter button instead.
Consult your water heater’s manual for specific instructions tailored to your model. There can be some variability between types of gas valves and control interfaces.
Typically, the gas control or nearby diagram will have words such as 'Off’, 'Pilot’, and 'On’. Make sure to set it to 'Pilot’ before continuing.
With the controller set to activate the pilot gas flow, you can move to the next step of lighting the pilot flame.
Learn to relight your gas water heater’s pilot light using either a manual technique or the built-in electronic igniter.
The manual process involves igniting the pilot with a long match or lighter after confirming gas is flowing to the component.
Many heaters have a push-button igniter installed on the gas valve to electronically light the pilot.
Consult the indicator light, if your water heater has one installed, to confirm successful ignition.
A constant flame indicates your pilot light is now re-lit. Proceed by testing its stability.
Manually lighting your gas water heater’s pilot requires careful attention to safety. This method involves igniting the pilot flame by hand using a long fireplace match or butane lighter nozzle.
Ensure you maintain a safe distance from the pilot chamber to avoid burns from flames and hot surfaces during this process.
When lighting the pilot manually, follow safety protocols rigorously, keeping clear of the heater’s interior throughout the process.
Modern gas water heaters often include electronic ignition systems for lighting the pilot, providing a user-friendly alternative to the manual method.
Electronic ignition uses a push button igniter, typically located on the gas control valve. Follow these steps to relight with this method:
If your model has an indicator light, it will confirm a successful ignition. Consult the manual for full instructions on electronic ignition.
With the pilot re-established, the next step is testing its stability before exiting the relight process.
Once the pilot flame is lit, either manually or with an electronic igniter, confirm it stays lit to ensure a successful relighting.
Visually inspect that a steady pilot flame is present at the end of the pilot tube. Observe this flame for 2-3 minutes to ensure it continues burning consistently without going out.
If the flame is unstable or goes out during this test, relight it by repeating the lighting procedure to secure a constant pilot flame.
Once the pilot flame burns steadily, turn the gas control valve to 'On’. On conventional gas valves, rotate the dial clockwise to the On marker to enable gas flow to the main burner.
Set your hot water controller to the desired temperature.
You should hear the main burner ignite, signalling that the pilot relight task is finished and hot water service will return shortly.
If the pilot flame goes out after relighting, consider these troubleshooting tips before reaching out to a professional.
Frequent pilot outages often stem from issues like:
If troubleshooting doesn’t resolve the issue and the flame still falters or goes out, a plumber should be contacted for a proper diagnosis.
A professional, with their specialised skill in identifying issues, can swiftly relight the pilot and ensure reliable hot water supply.
While relighting your gas water heater’s pilot light is usually a straightforward DIY task, it’s important to know when to call for professional assistance.
If you’re unsure about how to relight a troublesome pilot after persistent outages and troubleshooting, and you smell gas or have safety concerns, it’s time to seek a plumbing professional.
Our licenced gas fitters at Marrickville Plumbing boast a wealth of experience in servicing and repairing water heaters across Marrickville and surrounding areas.
Contact us at 1300 349 338 or through jobs@marrickvilleplumbingservices.com.au for a same-day appointment.
Leveraging our in-depth knowledge, we’ll ensure your hot water reliability and offer appliance replacement advice if needed for your safety.
Contact us for swift assistance - your comfort and safety with gas appliances is our utmost priority.
Common signs your hot water system is failing include strange noises, rust, leaks, inconsistent temperature and pressure. Call our licensed plumbers if you notice these issues for repairs.
Read MorePipe relining is an eco-friendly alternative to pipe replacement that uses materials like epoxy resin to repair pipes without digging. It produces less waste and emissions than traditional methods. Learn about the environmental benefits of trenchless pipe relining.
Read MoreReplacing an outdated electric, gas or solar hot water system with a more efficient heat pump or solar model can significantly reduce your energy bills and carbon footprint. Take advantage of available rebates. Contact us to retrofit your old system today.
Read MoreMarrickville, 2204 NSW
We will call back as soon as possible.


